Laravel 是 PHP MVC 系統框架,可以加快系統開發速度,而且有完整的生態系,提供元件與資源,目前我覺得 Laravel 資源比較多,較方便我學習,我從 Laravel 5 玩到 Laravel 10 雖然中間有幾版,我沒有去使過,再去使用時非常好上手,對於想從 WordPress 框架下畢業轉跳 PHP 運用是個不錯的選擇。
在本機建立伺服器環境
*要在本機建立 PHP、阿帕契網站環境可以看這篇如何使用 Python 爬取原價屋價目列表😜,別辛苦在遠端測試所寫的程式。
Windows 安裝 Composer 與 Noder.js
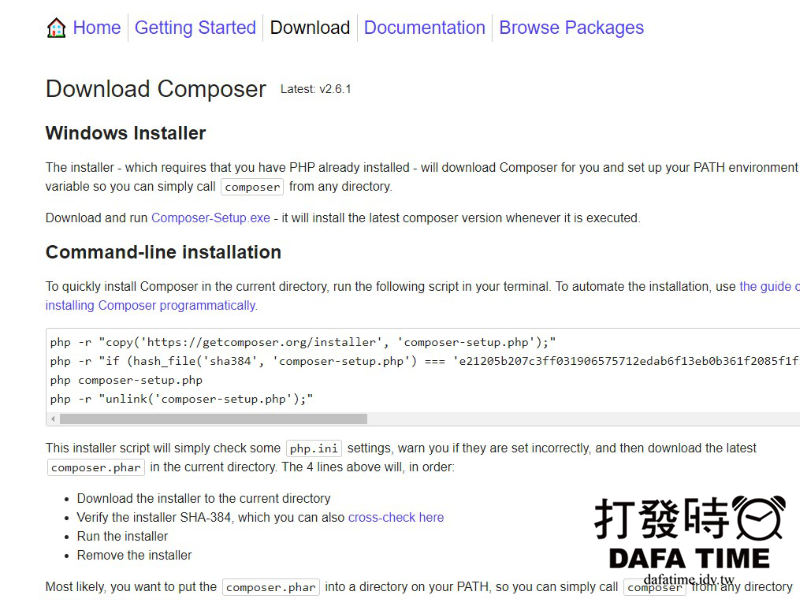
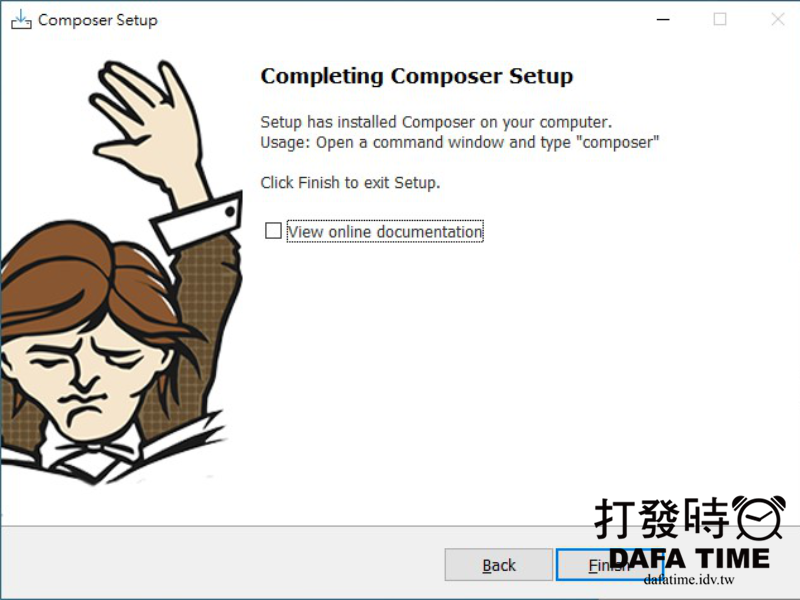
要建立 Laravel 的開發環境有點麻煩,如果是使用上面方式建立環境這裡可以跳過,但無法在vs code 下執行相關指令,為了方便使用,還是來安裝一下 Composer 與 Noder.js,Windows 安裝方法,先來去 Composer 官網下載安裝檔,點擊安裝檔開始安裝,下一步下一步就可完成安裝,注意下面圖記得指向 PHP 檔案位置,再來到 Noder.js 官網下載安裝檔,一樣點擊安裝檔開始安裝,下一步下一步就可完成安裝😜。


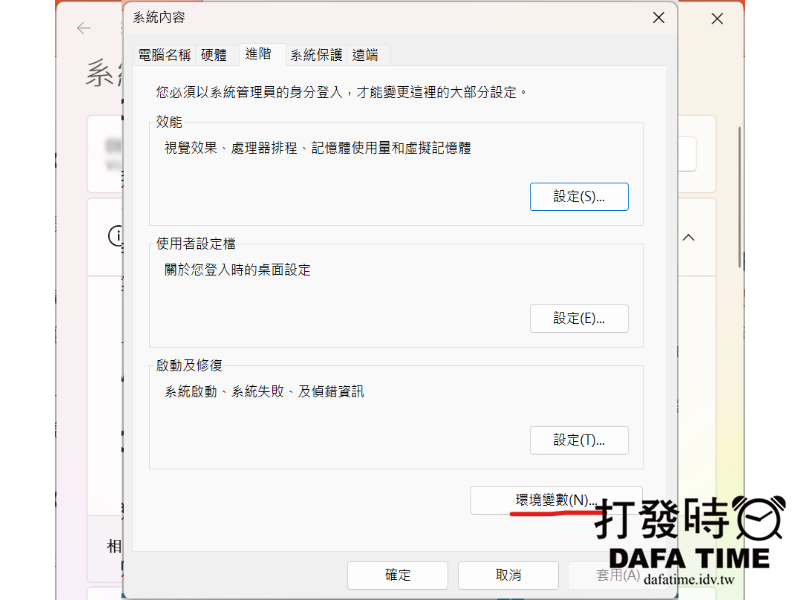
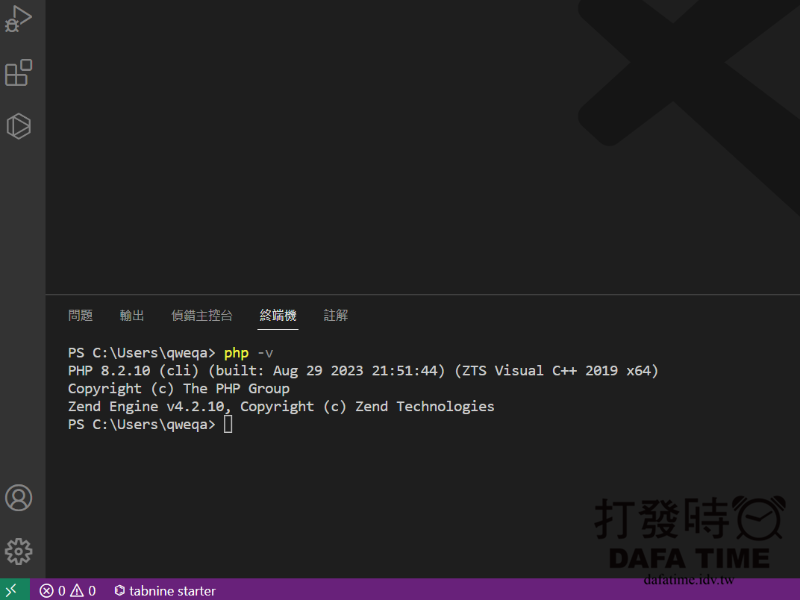
再來是 Windows 設定,到系統資訊->進階系統設定->環境變數->系統變數->Path->編輯,加入 PHP 的檔案路徑,然後重新啟動電腦,開啟 VS Coder 按下快捷鍵 ` 呼叫出 cam 面板,輸入 php -v 就會列出目前環境的所使用的 PHP 版本,與你安裝的版本一樣表示 PHP 環境已經建立好了(以下圖片是win11)。


使用 Composer 安裝 Laravel 10
安裝 Laravel 10 非常簡單,可到 Laravel 10 官網安裝教學 使用 composer 指令來安裝,在 vs code 安裝前先確定安裝路徑,裝在 laragon\www 資料夾內,接著輸入安裝指令如下,就會看到安裝文字:
composer create-project laravel/laravel l10img打開建立的專案資料料夾底下的 l10img\.env 檔案,設定對應的資料庫連線位置、名稱、帳密如下:
DB_CONNECTION=mysql
DB_HOST=127.0.0.1
DB_PORT=3306
DB_DATABASE=l10img
DB_USERNAME=root
DB_PASSWORD=
安裝 Bootstrap 5 框架
安裝完,進入資料夾,就可看到 Laravel 框架的檔案,再來就是建立上傳功能需要的檔案,在建立前先來決定要用那個 CSS 框架,這裡使用Bootstrap 5 接下來安裝,安裝指令如˙下:
//安裝 Laravel UI
composer require laravel/ui --dev
//生成bootstrap 框架
php artisan ui bootstrap --auth
//安裝bootstrap ICON
npm install bootstrap-icons --save-dev
//DAFATIME dafatime.idv.tw
在 resources\sass\app.scss 檔案最後載入 ICON 連結:
// Fonts
@import url('https://fonts.bunny.net/css?family=Nunito');
// Variables
@import 'variables';
// Bootstrap
@import 'bootstrap/scss/bootstrap';
@import 'bootstrap-icons/font/bootstrap-icons.css'; //加這行
//DAFATIME dafatime.idv.tw
繼續安裝 npm 與執行:
npm install
npm run dev
執行後可以看到如下圖結果就表示成功:

再開啟一個新的終端機輸入指令來啟動服務:
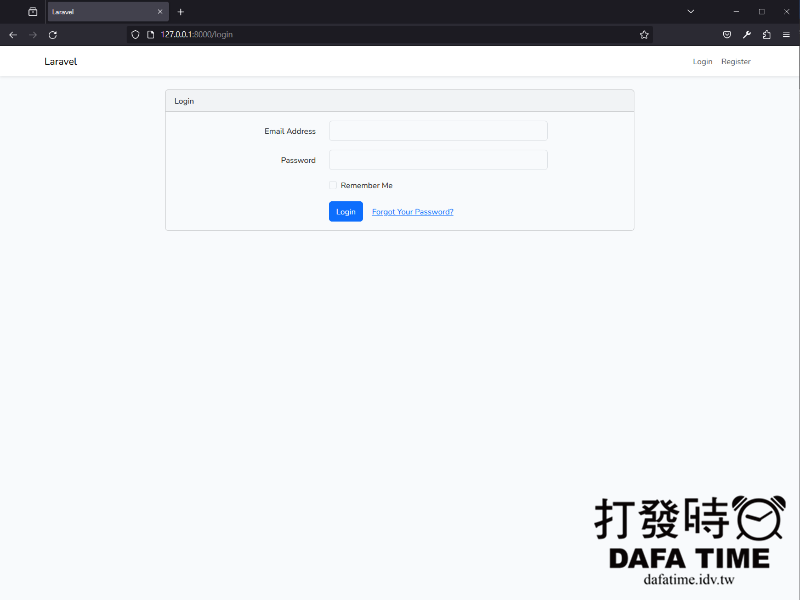
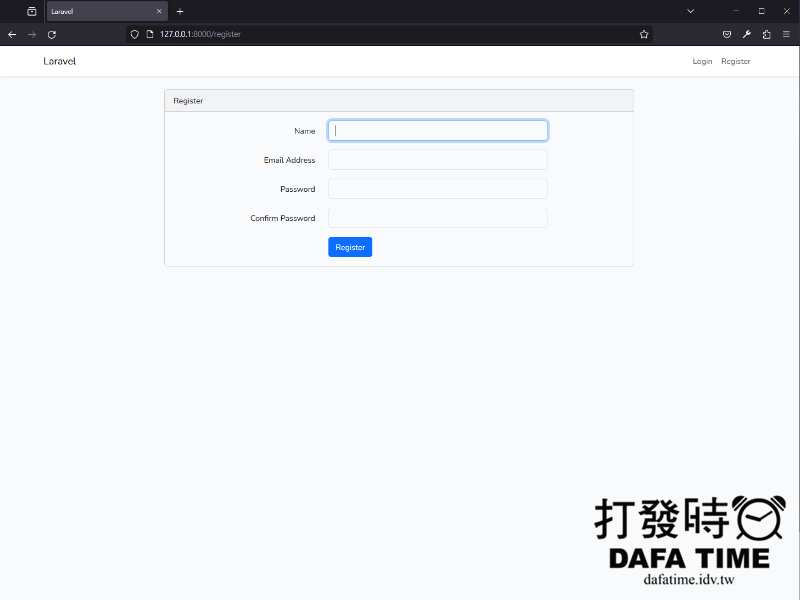
php artisan serve就會看到如下圖,表示服務啟動成功,在瀏覽器輸入 http://127.0.0.1:8000,就可以看到 Laravel 10 的歡迎畫面就表示 Laravel 10 框架正常運作,點選右上角的登入與註冊連結,頁面顯示正常就表示 Bootstrap 5 也安裝成功,後續就是開始建立上傳檔案功能。


建立 Laravel 10 單檔上傳與資料庫寫入
在 Laravel 框架建立流程,model、controller、view 的製作架構,這裡就不多說廢話就直接開始,使用下面指令來建立模組、控制的php檔案:
php artisan make:model SingleFile -rm我不想為了檔案的連結名稱出錯,在後面加了-rm 這樣會產生三個檔案,SingleFileControlle.php、SingleFile.php、2023_09_17_104056_create_single_files_table.php (檔案前面日期依產生當下時間而定),分別是控制、模組、建立資料表的php檔案,先打開 l10img\database\migrations\2023_09_17_104056_create_single_files_table.php,在裡面添加欄位來記錄檔案名稱如下:
<?php
use Illuminate\Database\Migrations\Migration;
use Illuminate\Database\Schema\Blueprint;
use Illuminate\Support\Facades\Schema;
return new class extends Migration
{
    /**
     * Run the migrations.
     */
    public function up(): void
    {
        Schema::create('single_files', function (Blueprint $table) {
            $table->id();
            $table->string('image')->nullable(); //添加的圖片檔案名欄位
            $table->timestamps();
        });
    }
    /**
     * Reverse the migrations.
     */
    public function down(): void
    {
        Schema::dropIfExists('single_files');
    }
};
會發現裡面的程式碼已經有預設,只要再加上需要的欄位即可,在輸入下面指令來創建資料庫 single_files 資料表:
php artisan migrate前面 .env 的資料庫設定沒有錯誤(設定沒錯,但別忘了開資料庫,與.env設定同名稱),資料庫就會建立 Laravel 的資料表添加的 single_files 的資料表,在打開 l10img\app\Models\SingleFile.php 檔案添加 image 欄位,名稱需與要建立的資料表一致:
<?php
namespace App\Models;
use Illuminate\Database\Eloquent\Factories\HasFactory;
use Illuminate\Database\Eloquent\Model;
class SingleFile extends Model
{
    use HasFactory;
    protected $fillable = [
        'image'
    ];
}
在打開 l10img\app\Http\Controllers\SingleFileControlle.php 檔案,添加要顯示的頁面 php 檔案名稱,與上傳檔案的 php 控制:
<?php
namespace App\Http\Controllers;
use App\Models\SingleFile;
use Illuminate\Http\Request;
class SingleFileController extends Controller
{
    /**
     * Display a listing of the resource.
     */
    public function index()
    {
        //要在哪個檔案顯示
        $SingleFiles = SingleFile::all();
        return view('singlefile', compact('SingleFiles'));
    }
    /**
     * Show the form for creating a new resource.
     */
    public function create()
    {
        //
    }
    /**
     * Store a newly created resource in storage.
     */
    public function store(Request $request)
    {
        //必填和限制上傳副檔名與檔案大小
        $request->validate([
            'image' => 'required|image|mimes:jpeg,png,jpg,gif|max:2048',
        ]);
      	//防止檔案名稱重複
        $imageName = time().rand(1,99).'.'.$request->image->extension();

        //DAFATIME dafatime.idv.tw
      	//儲存位置
        $request->image->move(public_path('images'), $imageName);
        SingleFile::create([
            'image' =>$imageName,
        ]);
		//顯示上傳成功
         return back()
            ->with('success','圖片上傳成功!')
            ->with('images',$imageName);
    }
    /**
     * Display the specified resource.
     */
    public function show(SingleFile $singleFile)
    {
        //
    }
    /**
     * Show the form for editing the specified resource.
     */
    public function edit(SingleFile $singleFile)
    {
        //
    }
    /**
     * Update the specified resource in storage.
     */
    public function update(Request $request, SingleFile $singleFile)
    {
        //
    }
    /**
     * Remove the specified resource from storage.
     */
    public function destroy(SingleFile $singleFile)
    {
        //
    }
}
檔案內的程式碼功能可分為 index、create、store、show、edit、update、destroy 這裡只會用到 index 與 store 沒用到的就先空這,在 index 有寫要 return 到 singlefile 這裡,在 l10img\resources\views\ 創建一個 singlefile.blade.php 檔案來顯示,在檔案內添加表單 html :
<!DOCTYPE html>
<html>
<head>
    <title>Laravel 10 圖片單檔上傳</title>
    <link href="https://cdn.jsdelivr.net/npm/bootstrap@5.0.2/dist/css/bootstrap.min.css" rel="stylesheet">
</head>
<body>
<div class="container">
    <div class="panel panel-primary">
        <div class="panel-heading mt-5 text-center">
            <h2>Laravel 10 圖片單檔上傳</h2>
        </div>

        <div class="panel-body mt-5">
            @if ($message = Session::get('success'))
                <div class="alert alert-success alert-dismissible fade show mb-2" role="alert">
                    {{ $message }}
                    <button type="button" class="btn-close" data-bs-dismiss="alert" aria-label="Close"></button>
                </div>
                <img src="images/{{ Session::get('images') }}" class="mb-2" style="width:400px;height:200px;">
            @endif

            <form action="{{ route('singlefile.store') }}" method="POST" enctype="multipart/form-data">
                @csrf

                <div class="mb-3">
                    <label class="form-label" for="inputImage">Select Image:</label>
                    <input
                        type="file"
                        name="image"
                        id="inputImage"
                        class="form-control @error('image') is-invalid @enderror">

                    @error('image')
                        <span class="text-danger">{{ $message }}</span>
                    @enderror
                </div>

                <div class="mb-3">
                    <button type="submit" class="btn btn-success">Upload</button>
                </div>

            </form>
        </div>
    </div>
    <div class="row justify-content-center align-items-center g-2">
    @foreach ( $SingleFiles as $SingleFile)
        <div class="col-2">
            <img src="images/{{ $SingleFile->image }}" class="img-thumbnail" alt="...">
        </div>

        @endforeach
    </div>
</div>
</body>
</html>
到 l10img\routes\web.php 添加路由器:
<?php
use Illuminate\Support\Facades\Route;
use App\Http\Controllers\SingleFileController; //單檔控制
/*
|--------------------------------------------------------------------------
| Web Routes
|--------------------------------------------------------------------------
|
| Here is where you can register web routes for your application. These
| routes are loaded by the RouteServiceProvider and all of them will
| be assigned to the "web" middleware group. Make something great!
|
*/
//DAFATIME dafatime.idv.tw
Route::get('/', function () {
return view('welcome');
});
//顯示與動作的路徑
Route::get('single-image', [ SingleFileController::class, 'index' ]);
Route::post('single-image', [ SingleFileController::class, 'store' ])->name('singlefile.store');
Auth::routes();
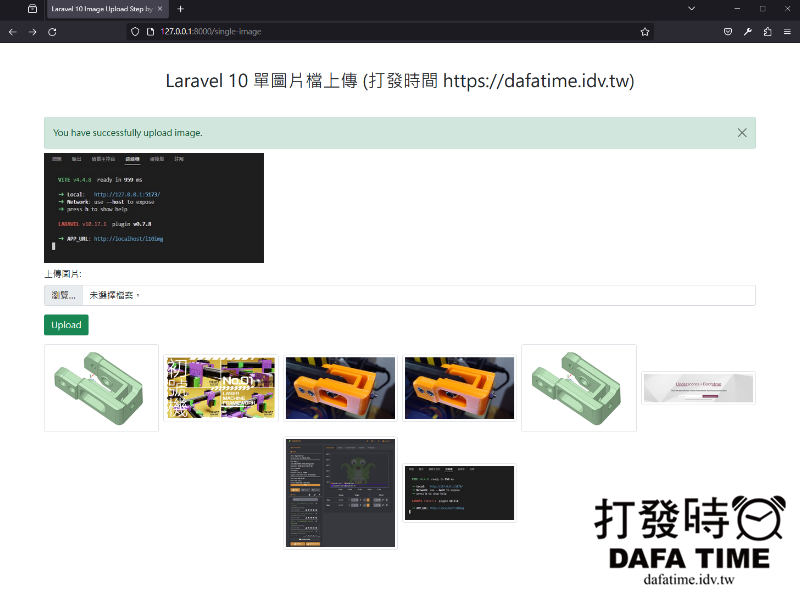
Route::get('/home', [App\Http\Controllers\HomeController::class, 'index'])->name('home');到這裡在瀏覽器輸入網址 http://127.0.0.1:8000/single-image 就可看到上傳頁面,上傳圖片成功有看到圖片顯示就表示資料庫有寫入圖片檔名,如下圖。

建立 Laravel 10 多檔上傳與資料庫寫入
單檔上傳與多檔上傳的程式碼方便看起來有區別這裡就重新開一個控制與頁面,一樣照上面步驟建立三個檔案,照樣在產生的三個檔案填入下面程式碼。
php artisan make:controller UplodeImageController -rm2023_08_20_142228_create_uplode_images_table.php
public function up(): void
    {
        Schema::create('uplode_images', function (Blueprint $table) {
            $table->id();
            $table->string('image')->nullable(); //添加的圖片檔案名欄位
            $table->timestamps();
        });
    }
UplodeImage.php
protected $fillable = [
        'image'
    ];
UplodeImageController.php
/**
     * Display a listing of the resource.
     */
    public function index()
    {
      	//要在哪個檔案顯示
        $uplodeimages = UplodeImage::all();
        return view('index', compact('uplodeimages'));
    }
    /**
     * Show the form for creating a new resource.
     */
    public function create()
    {
        //
    }
    /**
     * Store a newly created resource in storage.
     */
    public function store(Request $request)
    {
        $request->validate([
            'image' => 'required',
            'image.*' => 'required|image|mimes:jpeg,png,jpg,gif,svg|max:2048',
        ]);
        //DAFATIME dafatime.idv.tw
        // 這裡必須要把 input 多檔案轉為陣列,來寫入資料庫,重新命名的檔案上傳
        $images = [];
        if ($request->image){
            foreach($request->image as $key => $image)
            {
                $imageName = time().rand(1,99).'.'.$image->extension();
                $image->move(public_path('images'), $imageName);

                $images[]['image'] = $imageName;
            }
        }
        // dd($images);
        foreach ($images as $key => $image) {
            UplodeImage::create($image);
        }


        return back()
            ->with('success','圖片上傳成功!')
            ->with('images',$images);
    }
    /**
     * Display the specified resource.
     */
    public function show(UplodeImage $uplodeImage)
    {
        //
    }
    /**
     * Show the form for editing the specified resource.
     */
    public function edit(UplodeImage $uplodeImage)
    {
        //
    }
    /**
     * Update the specified resource in storage.
     */
    public function update(Request $request, UplodeImage $uplodeImage)
    {
        //
    }
    /**
     * Remove the specified resource from storage.
     */
    public function destroy(UplodeImage $uplodeImage)
    {
        //
    }
這裡注意 index.blade.php 檔案內的 input 多加了 multiple,欄位就可以一次上傳多個檔案。
<!DOCTYPE html>
<html>
<head>
    <title>Laravel 10 多圖圖片檔上傳</title>
    <link href="https://cdn.jsdelivr.net/npm/bootstrap@5.0.2/dist/css/bootstrap.min.css" rel="stylesheet">
</head>
<body>
<div class="container">
    <div class="panel panel-primary">
        <div class="panel-heading mt-5 text-center">
            <h2>Laravel 10 多圖圖片檔上傳</h2>
        </div>

        <div class="panel-body mt-5">
            @if ($message = Session::get('success'))
                <div class="alert alert-success alert-dismissible fade show mb-2" role="alert">
                    {{ $message }}
                    <button type="button" class="btn-close" data-bs-dismiss="alert" aria-label="Close"></button>
                </div>
                <img src="images/{{ Session::get('image') }}" class="mb-2" style="width:400px;height:200px;">
            @endif

            <form action="{{ route('image.store') }}" method="POST" enctype="multipart/form-data">
                @csrf

                <div class="mb-3">
                    <label class="form-label" for="inputImage">Select Image:</label>
                    <input
                        type="file"
                        name="image[]"
                        multiple
                        id="inputImage"
                        class="form-control @error('image') is-invalid @enderror">

                    @error('image')
                        <span class="text-danger">{{ $message }}</span>
                    @enderror
                </div>

                <div class="mb-3">
                    <button type="submit" class="btn btn-success">Upload</button>
                </div>

            </form>
        </div>
    </div>
    <div class="row justify-content-center align-items-center g-2">
    @foreach ( $uplodeimages as $uplodeimage)
        <div class="col-2">
            <img src="images/{{ $uplodeimage->image }}" class="img-thumbnail" alt="...">
        </div>

        @endforeach
    </div>
</div>
</body>
</html>
web.php
<?php
use Illuminate\Support\Facades\Route;
use App\Http\Controllers\SingleFileController; //單檔控制
use App\Http\Controllers\UplodeImageController; //多檔控制
/*
|--------------------------------------------------------------------------
| Web Routes
|--------------------------------------------------------------------------
|
| Here is where you can register web routes for your application. These
| routes are loaded by the RouteServiceProvider and all of them will
| be assigned to the "web" middleware group. Make something great!
|
*/
Route::get('/', function () {
    return view('welcome');
});
//DAFATIME dafatime.idv.tw
//顯示與動作的路徑
Route::get('single-image', [ SingleFileController::class, 'index' ]);
Route::post('single-image', [ SingleFileController::class, 'store' ])->name('singlefile.store');
//多檔
Route::get('upload-image', [ UplodeImageController::class, 'index' ]);
Route::post('upload-image', [ UplodeImageController::class, 'store' ])->name('image.store');
Auth::routes();
Route::get('/home', [App\Http\Controllers\HomeController::class, 'index'])->name('home');
到這裡在瀏覽器輸入網址 http://127.0.0.1:8000/upload-image 就可看到上傳頁面。
總結
Laravel 的檔案上傳教學就到這裡,細部調整只能看需求了,這個教學主要是以建立上傳模型,後續要怎麼改成自己要的,先這樣81~!😎。